Page 1 of 1
Uneven surfacing
Posted: Thu Jan 23, 2014 5:51 pm
by rsetina
I began resurfacing the slats that I made for my shark HD. I got partway through the resurfacing and noticed that the surface is not flat, it has steps. Is it possible that the router is not 90° to the table? And that would be the cause of the uneven surface and the steps? Has anyone had to shim the router mount in order to get the bits to be parallel to the table?
Re: Uneven surfacing
Posted: Thu Jan 23, 2014 6:42 pm
by tonydude
Rick,
I had the same problem. I had to shim the router mount. Get a small square and set it up to the bit. I use a 1/4" end mill when squaring. There are 4 bolts in the router mount loosen them and put a shim behind it and tighten it up
, you might have to keep trying a little to get it perfect. Haven't had any problems since.
Tony
Re: Uneven surfacing
Posted: Thu Jan 23, 2014 7:13 pm
by rsetina
Thanks Tony. I'll give that a try. Was there a particular material you found that worked best? What did you use? I'm thinking perhaps some nylon washers from the hardware store if I can find some thin ones.
EDIT:
I added 3 Mylar washers to shin up the front of the router clamp and it's very very close to perpendicular now. Thanks Tony.
Re: Uneven surfacing
Posted: Fri Jan 24, 2014 1:46 am
by McBuster
Re: Uneven surfacing
Posted: Fri Jan 24, 2014 2:06 am
by rsetina
Thanks for the info McBuster. I'll check it out and see if it would be better for me to remove the mylar washers and adjust the angle of the router that way or just leave it alone. It might be better to remove the washers and make the adjustment in the mount itself it that is why the adjustment is there in the first place.
Re: Uneven surfacing
Posted: Fri Jan 24, 2014 4:19 pm
by sk8nmike
I use MDF for spoil boards and have found that running the router Parallel to the Y axis(front to back) as opposed to back and forth yields a flatter surface.
Re: Uneven surfacing
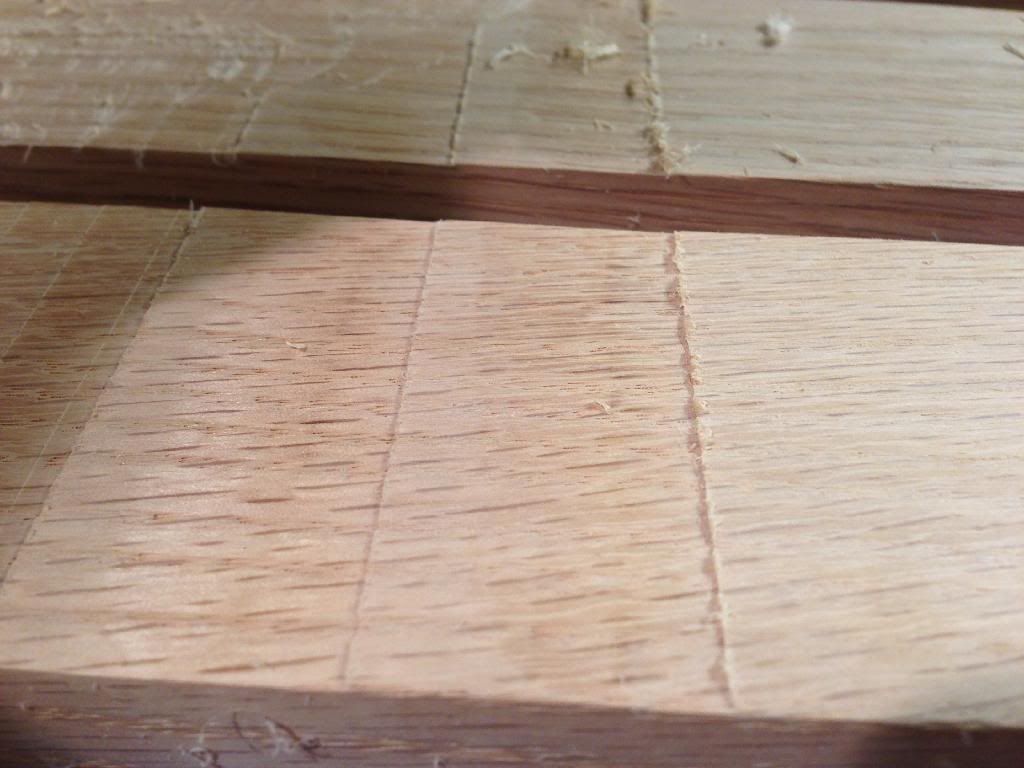
Posted: Fri Jan 24, 2014 5:24 pm
by milo30
It's been a long week so forgive me if my mind isn't working right but part of the reason for planing slats for a spoil board is to create a table that is flat and parallel to the router. It is hard for me to tell exactly from the pictures as I can't get a good perspective on the size. It appears to me that it is planing it flat but leaving some ridges. It looks to me that you need to reduce your stepover on your bit. When I ran a 1 1/2" bit at the default 20% stepover I got results that looked similar to that. I just used a scraper to knock the fuzzy part off and the table was flat. I reduced my stepover and also slowed it down just a bit and it solved the problem.
Before I went to the trouble of making physical adjustments, I would check and see if it is in your software settings. You can use a piece of heavy wire bent in a Z shape, place one end in the router and lower the other until it makes contact with the table. Spin it around and see if you are getting the same contact at different parts of the circle and jog it to other areas of the table. The longer the wire, the more accurate the reading will be.
As sk8nmike stated, you can also changed the direction of the cut to get better results. I get better results with the grain than against it.
Re: Uneven surfacing
Posted: Fri Jan 24, 2014 5:57 pm
by Consultingwoodworker
As stated, the axis of the router is not perpendicular to the plane it runs on. (The table is another issue)
When I was installing CNC machines, I used to use a shop-built trammel to check the head. I used the body of a drill press circle cutting jig and added a 12" steel tube in place of the 4" arm. I then mounted a dial indicator to the end of the arm. This allowed me to set the router to within a half a thousandth over 24" side to side or back to front by chucking the trammel into the collet of the router and touching off.
You do not probably need that level of precision with the Shark. You could run a bolt through a 6" piece of flat stock and measure from the tip to table to see how far you are out. Remember that the actual figure will be half of the difference between two points measured 180 degrees apart.
Ralph
Re: Uneven surfacing
Posted: Fri Jan 24, 2014 7:36 pm
by rsetina
After machining the center section of the spoil board I installed a 1/4 inch end mill. Using a machinist's square I check to see how far off perpendicular the bit was to the machined table section. Over a 2.75 inch length of the bit it was slightly under 1/8 of an inch off. It's now perpendicular so tonight I'll attempt to flatten it again. It should go much better this time.
Re: Uneven surfacing
Posted: Sat Jan 25, 2014 6:25 pm
by rsetina
Success! I resurfaced the oak slats today and after running a 1/4inch pointed dowel across the surface of the slats, it's flat! Thanks everyone for your input and ideas. Now I need to get to work on a few projects. The 2+2 bit from Tools Today did a great job. sk8nmike, I did just what you suggested and ran the surfacing from front to back. It worked perfectly. Good idea. Thanks again guys. I'm a happier cnc'er today.
